We have a saying in crypto: “not your keys, not your coins.”
Meaning – if you don’t hold direct access to your tokens, you’re not actually in control of what happens with your tokens.
If you’d like to maintain complete control of your assets – we’d recommend that you purchase and learn how to use a Ledger Hardware Wallet.
However, if you’re looking to stake larger amounts of tokens, Figments works with several trusted third-party custodians. For more info, send a message to support@figment.io.
Self-custody at a glance
- Self custody means that you are in charge of the ‘keys’ to your crypto assets – no one else.
- You’ll use the hardware wallet to sign your transactions.
- The Ledger Nano S and X are for different levels of portfolio management:
- The Nano S is for smaller portfolios and can only support up to 6 applications, and requires a wired connection to work.
- The Nano X is for diversified portfolios and can support up to 100 applications, in addition to working over Bluetooth with your mobile devices.
*Keep in mind, the Ledger Nano S only works in ‘consultation mode’ on the iOS mobile app – you won’t be able to confirm transactions with the hardware wallet when connected to an Apple iOS device at this time.
Why self-custody your assets?
If your assets are on an exchange, the exchange controls them and gives you permission to move them off of the exchange. If the exchange is compromised, your assets can be irrecoverably lost. There are many examples of this happening in the past. In the crypto industry, you are in control over whether you lose your money as a result of another organization’s security mishap. If you have substantial assets on an exchange, we strongly suggest finding another custody solution, such as self-custody.
Self-custody means that the owner(s) of digital assets control the transfer of their digital assets via ownership of their private key. The owner of a private key owns their digital assets, so the key must be protected at all times – and if you’re using a hardware wallet, the key is never exposed to the internet.
If you’ve signed transactions using Metamask, you’re already familiar with the concept of connecting your wallet to the network. The difference here is that Metamask gives you a seed phrase from a wallet in your browser upon setup. This seed phrase can then be entered again in your browser to recover your account, incurring a certain level of risk if mismanaged. With a hardware wallet, you never take on that risk.
Ledger has been in the hardware wallet game since 2014 – so they know what they are doing. Their hardware wallets operate a BOLOS (Blockchain Open Ledger Operating System), allowing its users to isolate each protocol environment from another within their Ledger Live app. This means that if something goes wrong on one blockchain and it affects your tokens, your wallet isn’t compromised. Since only the app can be affected.
How to get started with self-custody on Ledger
The Ledger website published a four-step process to getting started, where you can:
- download the Ledger Live software for your computer or mobile device
- choose a PIN for your device and back up (and carefully protect) your seed recovery phrase,
- Install the applications on your device (eg. Bitcoin, Cosmos, Ethereum, etc)
- Optionally create a Ledger Live account to manage your assets.
*If you’ve installed the Ledger software on your computer, you’ll want to check for any firmware updates, either with the device or with the individual applications that you’re using. You can make sure you’re on the most recent version here for the Nano S, and here for the Nano X.
How to Install Applications on your Ledger Device (Desktop)
First, ensure that your Ledger Live software settings have ‘developer mode’ turned on, which can be found in ‘experimental features.’
There are a number of networks with Ledger applications that are still in beta. This will not compromise the security of your assets (due to the BOLOS mentioned above), but you will only be able to install or see them when in developer mode.
In order to add an asset network to your device, follow these steps:
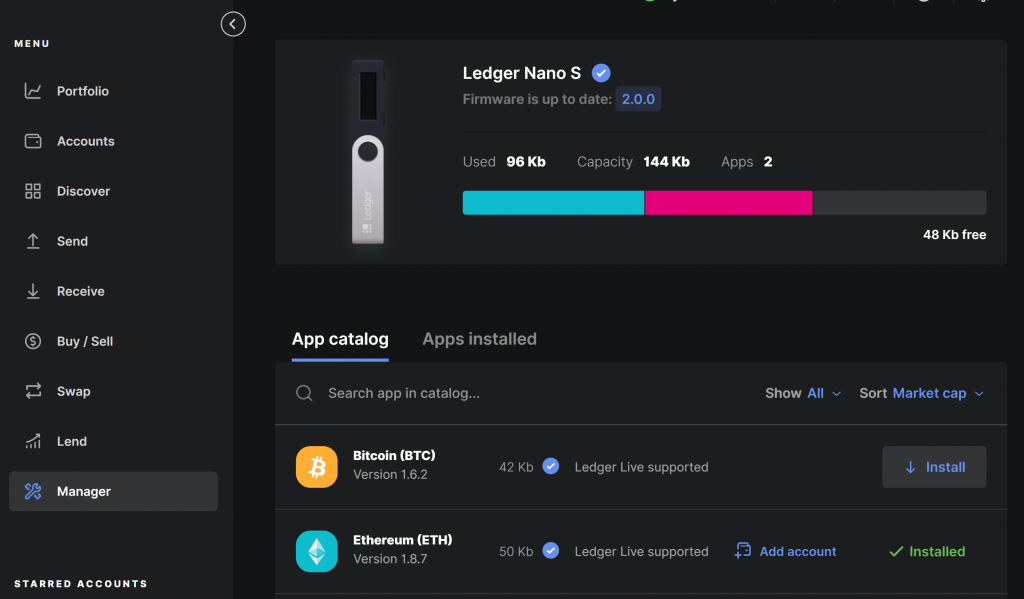
- Search for the app to install in the App catalog.
- Click the Install button of the app. Your device will display the prompt: ‘Processing…’ during which the app will be installed on your device.
- You can install multiple apps at once by clicking their Install buttons. Wait for the installations to finish before you quit the Manager.
If you decide to go with a Ledger Nano S, you’ll be limited to approximately six applications on the device, which means you can only manage six currencies at a time. When you decide to start working with a seventh currency, you’ll have to delete one of the applications that is already on the device.
If you choose the Nano X, however, you’ll be able to install up to 100 applications.
You can see which assets Ledger supports here. Some cryptocurrencies will supply their own open-source Ledger app before Ledger themselves do.
AN IMPORTANT NOTE FOR OUR USERS
When you decide to set up your ledger wallet, it will provide you with a 24 word long seed phrase. If there is no other part of this article that leaves an impression upon you you must guard this seed phrase more than anything else in your wallet – if you lose this phrase, you will not have access to your wallet and you will lose your funds.
Ledger provides three note cards to record your seed phrase multiple times. When you write down your phrase on the provided sheets, be extra judicious with your accuracy. nce you have confirmed the phrase on the device, keep your seed phrase safe and backed up in multiple locations. The reason they give you three sheets is so that you don’t have them all in the same place.
Adding tokens to your wallet (on desktop)
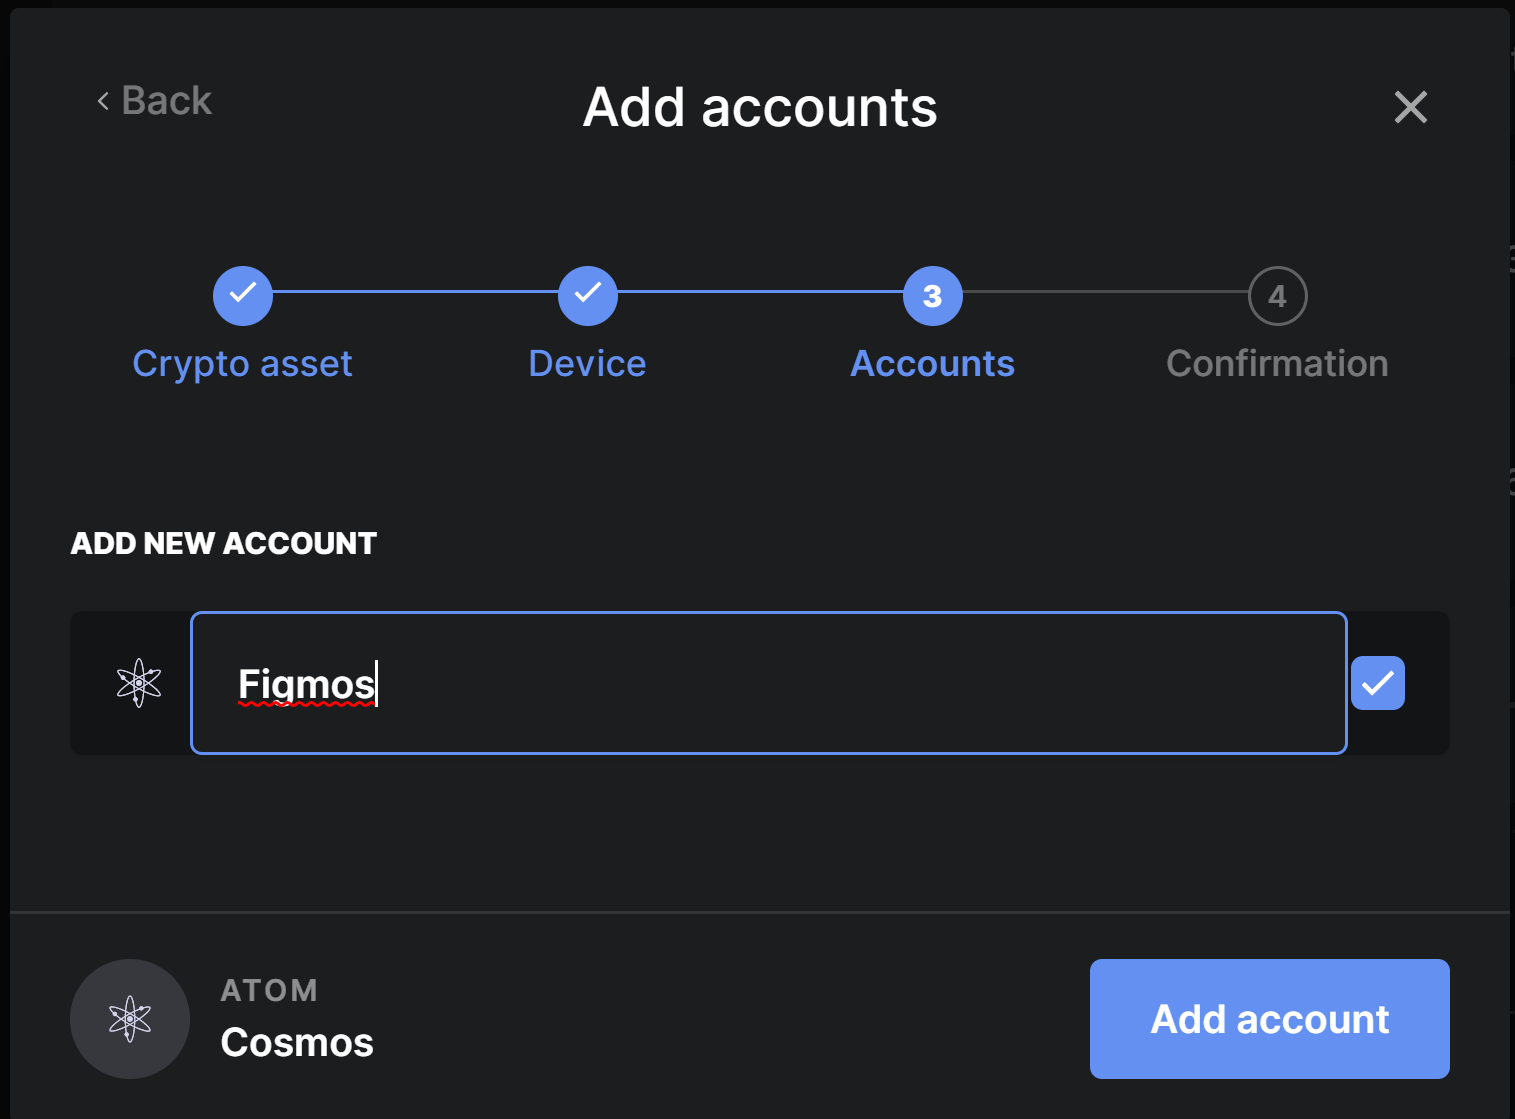
Once you’re set up with the wallet on your computer, you can use the Ledger to add tokens to your account. In order to do so, you’ll first need to create an account. Head to the ”Accounts” section on the left-hand panel to make a new account for each currency.
- Click on ‘Add account’
- Choose the asset type
- Connect your device with the appropriate cable and authorize
- Add a new account for the currency you want to send in.
Once you’re done with this step, you’ll want to head to the “Receive” panel within the application. This is where you’re going to select the account you just made for receipt.
This will take you to a page that displays your wallet address.
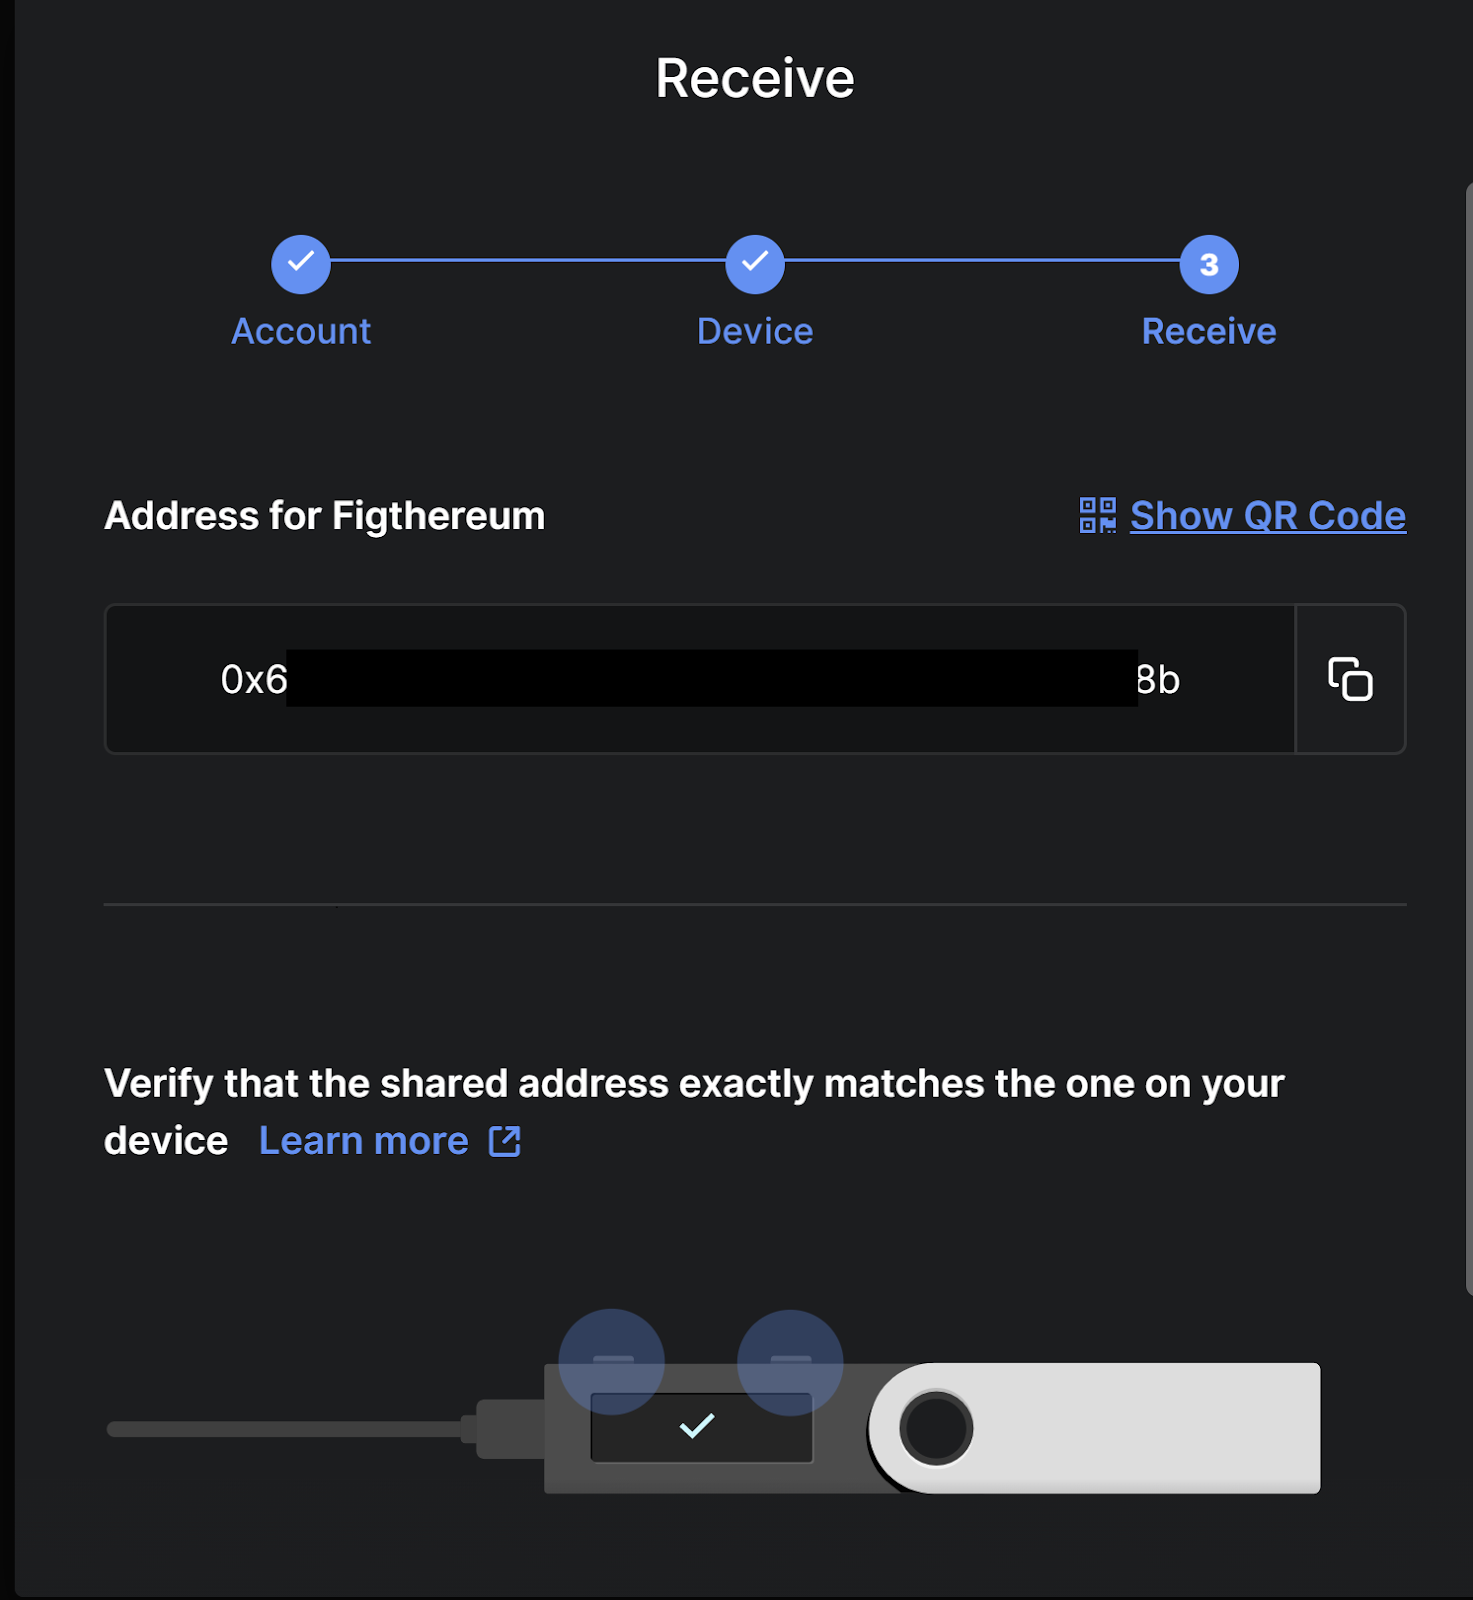
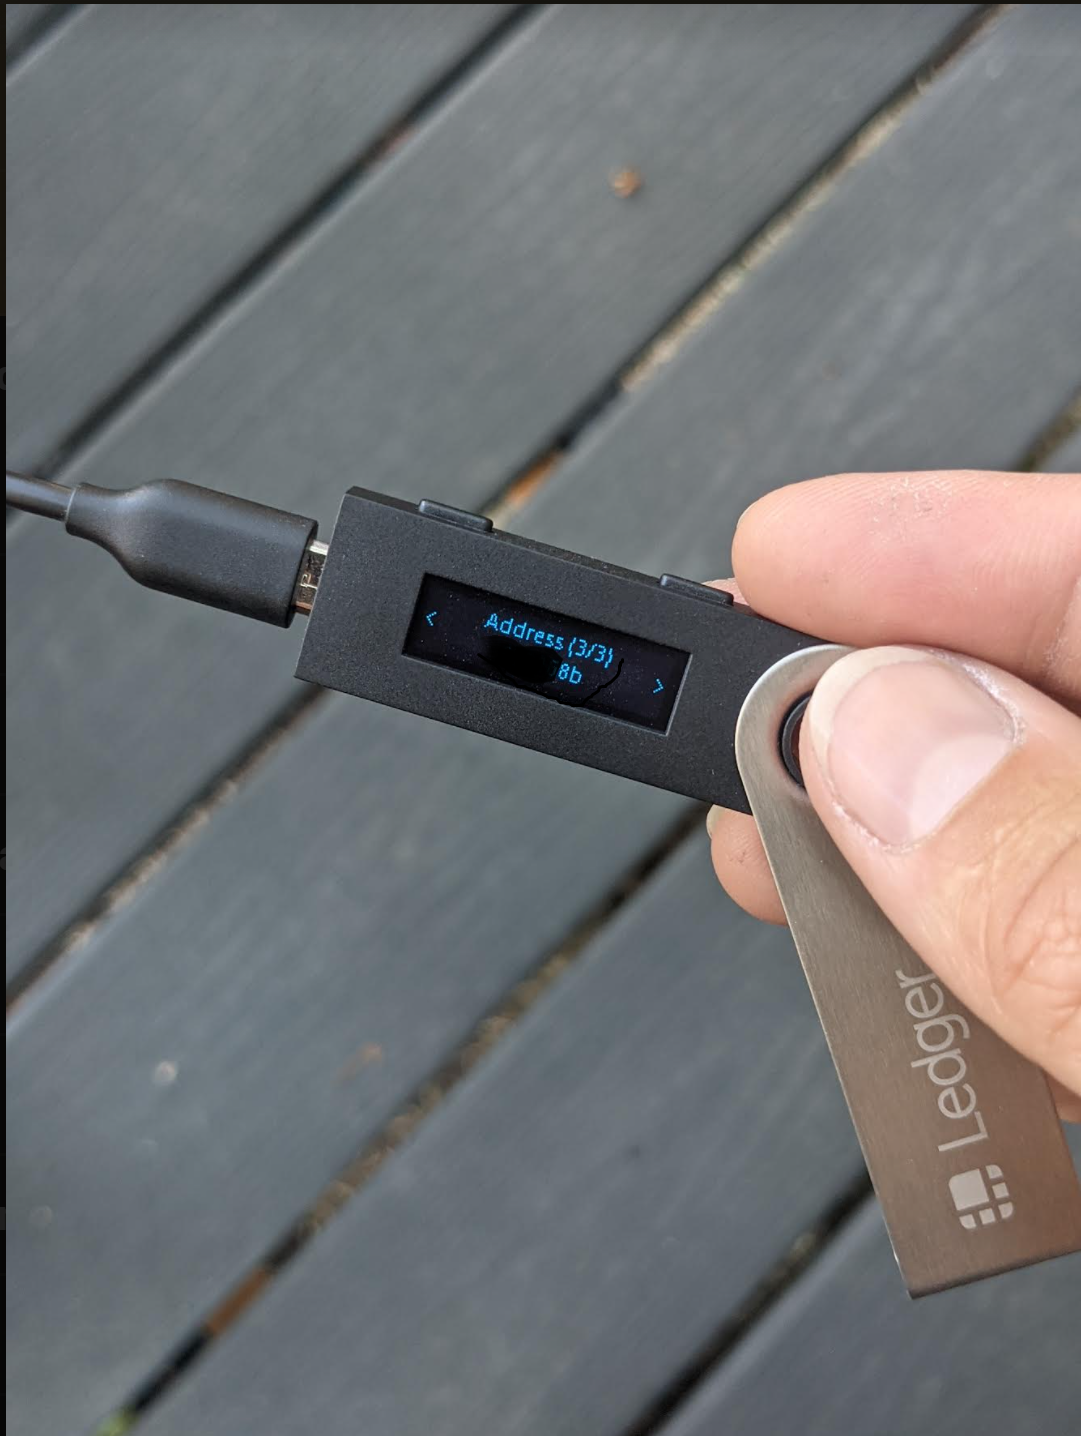
This is the part where you’ll want to cross reference the address on your Ledger Wallet screen and the address that you copied from the Ledger Live app and pasted into the ‘send’ field on your exchange. Be judicious here – sending your tokens to the wrong address can be a costly mistake.
In order to send the funds to your account, you are going to copy the code under ‘Address for (account name)’, and paste it into the sending field within whichever sending field is available to you from your exchange. Here’s what it looks like on Coinbase:

If you did it right, the funds will show up in your wallet in under 10 minutes.

Adding Tokens to your Wallet (Android)
If you’re going to manage your portfolio from your mobile device:
- Tap on the ‘Transact’ button at the bottom center of your screen. (it looks like two arrows going in opposite directions)
- Select the ‘receive’ option.
- Pick the account to credit, or create a new account
- Pick the connected wallet you want to use to manage the account.
- Make sure your wallet is connected
- The Nano S will be connected through your OTG cable
- The Nano X needs to be turned on and connected via Bluetooth
- Tap on ‘Verify’ in order to display the receive address on your ledger address.
- Verify that the address on your ledger and your phone are the same address.
- If the addresses match: Press the right button to select Approve then press both buttons to confirm the address shown in Ledger Live.
- If the addresses don’t match:**** Select *Reject* on your device and do not send to it.
- Copy the address into your clipboard and paste it in the ‘send’ field from your exchange.
- Your tokens should arrive to your Ledger Live wallet within about 10 mins.
Sending tokens from your Ledger Wallet
- Tap the Transact tab at the bottom of the app (it looks like two arrows going in opposite directions)
- Tap Receive.
- Choose the Account to credit.
- Choose the Ledger that manages the account to credit.
- Make sure the device is turned on and unlocked.
- Open the crypto asset app as instructed
- Read the on-screen instructions and tap on Verify to display a receive address on your Ledger Nano.
- View the address and verify that it is the same as the address shown in Ledger Live.
- If the addresses match: Press the right button to select Approve, then press both buttons to confirm the address shown in Ledger Live.
- If the addresses don’t match: Select *Reject* on your device and do not send to it.
- Click Copy or Share and share the address with the sender of the transaction. Carefully check that the address does not change after you copy and paste it or tap the Re-verify button to display on your device again.
Staking from your Wallet
If you’re looking to stake from your Ledger wallet (we highly recommend that you do, because that’s what we do!), head to the protocol of your choice under the ‘Stake’ option at the top of the page for instructions on how to do so within each protocol’s environment.
Congratulations!
Keep in mind here – this means that you’re going to have the funds under only your custody. You are now your own bank!
Looking for alternatives to self-custody? Got questions?
Reach out support@figment.io if you have read online resources/documentation and cannot confidently self-custody your digital assets. There are alternatives to self-custody, such as third-party custody services. Contact us if you would like to learn more about your custody options.
In the meantime, you can find me on Twitter